HOW TO CHANGE DNS FOR A DOMAIN (NAMECHEAP.COM)
- 10 SEPTEMBER 2022
- by: WEB GUY
- in: DOMAIN NAMES,WEB HOSTING
- Tags: CUSTOM NS RECORDS, DNS, NAME SERVERS
- note: NO COMMENTS
To change the Name Servers for your domain, you will need to do the following:
1. Sign in to your Namecheap account.
2. Select Domain List from the left sidebar and click the Manage button next to your domain:

Select Custom DNS and add the provided NS records.

3. Find the Name Servers section and select your preferred option from the drop-down menu. Click on the green checkmark to save the changes:

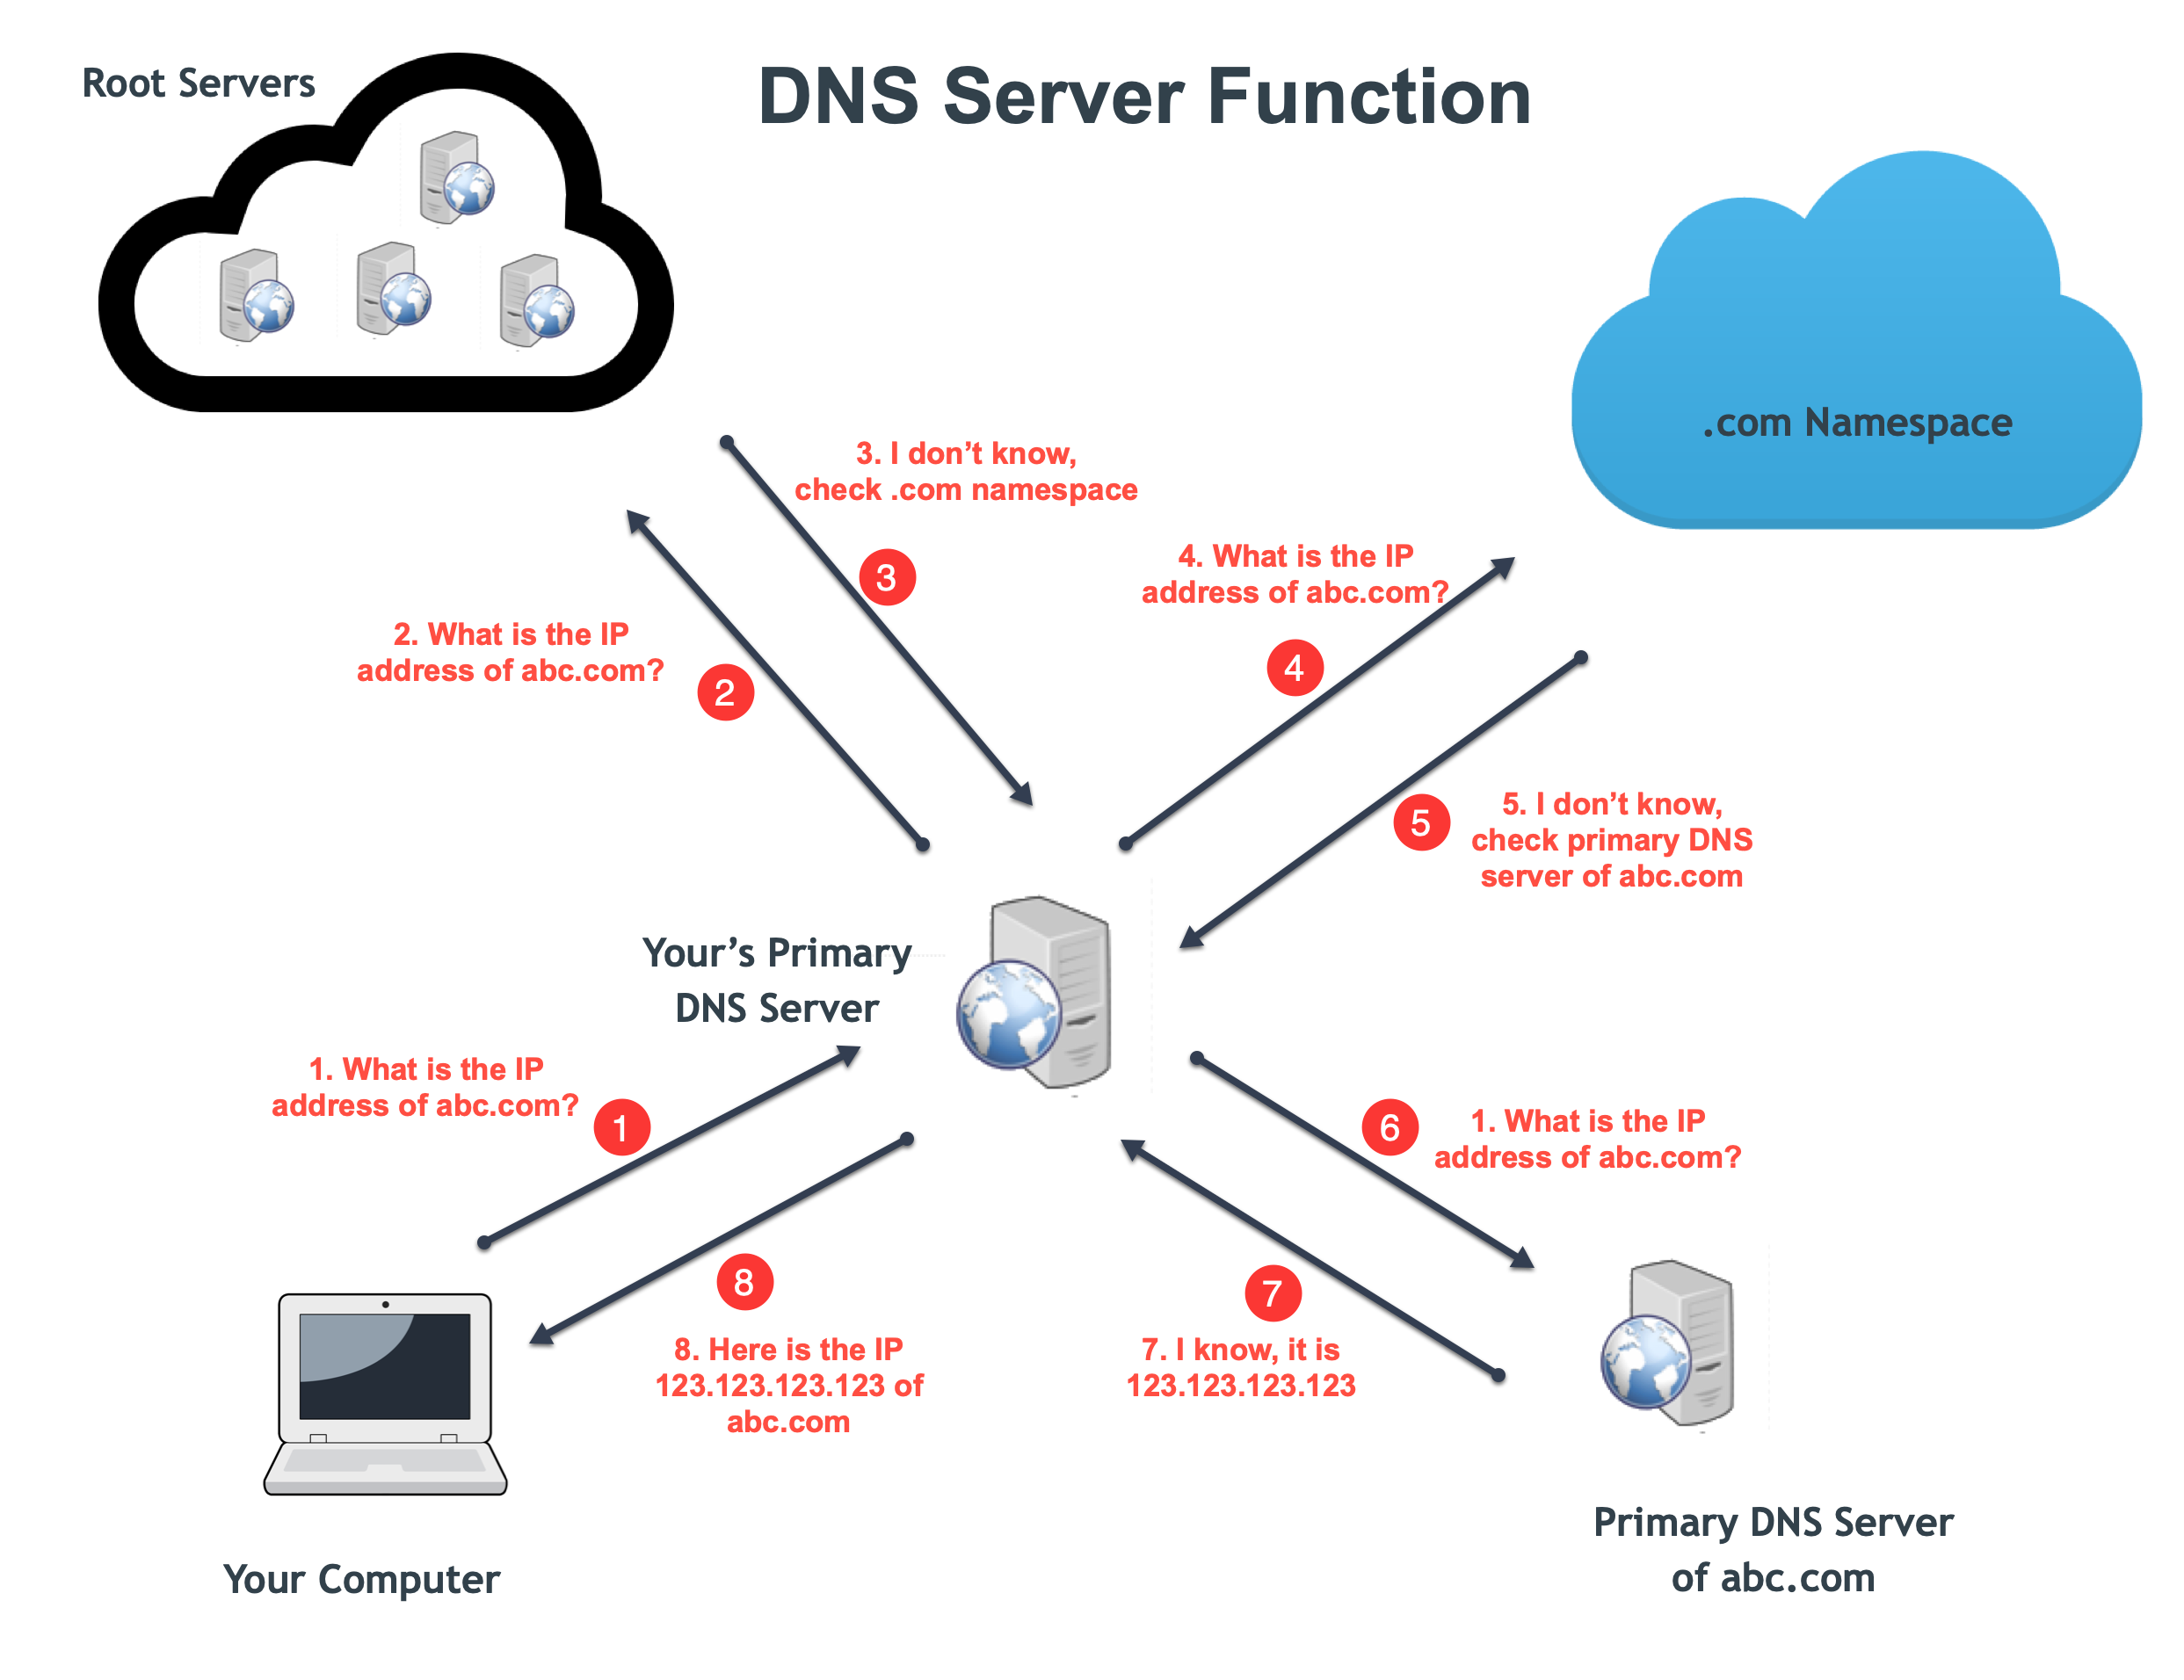
NOTE: Name Servers are part of an extensive database called the Domain Name System (DNS), which acts as a directory for devices and the IP addresses attached to them. During the name servers registration, the IP address is assigned to the name servers. The unregistered name servers do not have associated IP address and cannot work properly with some domains. For example, the Registry of .net domains checks whether the name servers are registered and do not allow using unregistered name servers.
You can choose from four possible options:
ImbiSoft Default Name Servers – if you wish to point your domain to our default name servers:
Default Name Servers
ns1.imbisoft.com
ns2.imbisoft.com
Shared Hosting Records
NS javier.ns.cloudflare.com
NS kayleigh.ns.cloudflare.com
NOTE: 1. Once the name servers are changed, all the custom DNS records for your domain name will be overwritten to our hosting ones. You will be able to re-create them in your account’s DNS Editor from where you can manage domain’s settings.
CustomDNS – if you wish to point your domain to custom name servers (for example, your Personal DNS servers or third-party hosting name servers if your domain is hosted with another DNS provider), you will need to fill in your hosting name servers to the empty lines and click on the green checkmark to save the changes:
After adding our NS records, click the green check sign to save.

- Log into your account and access domain settings
- click on the green arrow and select Custom DNS
- Add the custom Name Servers
- Click the green checkmark to save
- NOTE: It’s required to enter the name servers in the format provided, if you enter the IP addresses instead, the system will not accept this. Thus, if you were provided with both the name servers and IP address(es), only the name servers should be inserted as custom name servers.
Namecheap PremiumDNS is a paid DNS service that can be used with any domain registered at any registrar. This option will be available for the domains that have a PremiumDNS subscription attached.
- NOTE: If you change name servers from Custom name servers to our default ones or vice versa, the records will not be added to the new name servers automatically. Please make sure to save all the needed settings and set them up manually after the name servers switch.
Name Servers changes or some DNS records do not propagate instantly. Once your name servers are changed, it may take up to 24 hours (more, in rare cases) for local ISPs to update their DNS caches so that everyone can see your website.
You can always check your domain name using any Proxy server as Proxy servers do not store cache, thus you can see the non-cached information.
VERY IMPORTANT.
If you are pointed your domain name to us (added our name servers), it is your responsibility to ensure that your domain name and its contact details are up to date. If your domain name is not renewed on time, your website will go offline and you will possibly loss all its content for good. If you need any help, kindly contact us.
That’s all she wrote!
If you have any questions or need assistance, please contact us.
